
To give you an idea of what we were working with before getting started, I took a page from all the home-reno shows on cable and took before, during, and after pictures. To give you an idea of what I was working with before, here is a shot of the sink and toilet. Please excuse the smiling child in front of both.

The walls were a pale purple and we had a flowery shower curtain. The toilet was known to rock when you sat on it and was stained beyond belief much to my wife's chagrin whenever we had company. The cabinet doors stuck if you ever tried to open them. The bathroom also serves as our laundry room, and the open shelves over the machines were simple planks of wood, that were forever dirty and disorganized.
 Kate and I have been eyeing a remodel for several months and had fixtures picked out and budgeted for. We knew it was a small room, and that would help, plus we decided to wait on changing out the tub until next year.
Here is the vanity we wanted at first, but budget won out and we got this one instead, with matching mirror. I can't say we minded the downgrade, but are really happy with the results. We also quickly picked out a toilet, vinyl floor tiles, and paint.
That was the easy part!
When my Father-in-Law volunteered to take a week to come help me put it all in, the ball really got rolling. We started making plans for the family to disappear for the week, as we would be taking over quite completely to get it all done. The day he was scheduled to get in, I began tearing out the old 12-inch tiles with a handy scraper blade on my multi-tool. However, around lunch, I thought a cold drink would be nice.
 So, this happened.
When he finally arrived, The real work began. The hardest work of any remodel is the demolition. You need to take out everything you don't need, and nothing you do, so its always a fine line to walk. Then you need to make sure what you have left is suitable to build upon. In our case, the foundation was shaky, and that added plenty of unwanted work to this reno.
 On the first day, we uncovered our largest issues. Behind our laundry, we found the pegboard backing of the wall didn't extend all the way to the floor.


Just the demolition took most of day one. We also had a nice BBQ and broke into the fine Michigan microbrews around dinner. Day two the real work would begin.
 Most of the work at this point is brute force, cutting, tearing, pulling... then we started making our plans for what to do to shore up the foundation and get a great looking bathroom out of it. We of course would start with fixing the floor around the toilet. This involves cutting away the rotting subfloor and replacing it with solid plywood, and of course required a trip to the hardware store for plywood and a 2x6 to anchor the new plywood to the old floor. Our floor is about an inch and a half hardwood composite that took two layers of plywood to match the thickness of the old floor. We built a platform from the 2x6 attached to the studs underneath and used 3 inch deck screws and construction adhesive to secure the new wood in place.
 Once the floor was shored up we attacked the wall, cutting out the old wallboard and replacing it with new 1/3" gypsum board. Drywall screws and spackling finish it off, leveling the new wall to the old, and allowing us to paint seamlessly over the two.
After a full day, my hope was to get the vanity mirror down and start priming the wall, so we could move on with the floor, but the old tile had left a nasty sticky residue that had to come up in order to lay the tile. This was the point where my Father-in-Law bought a stripper. Just like the other kind of stripper, we did not get any pictures. This stripper comes in a can and you pour it on the floor to let it do its work. Once it had set for about an hour, we got down on our knees and scraped at it to remove as much as we could. Not much came up. So, the priming was going to have to wait another day.
The next morning, before breakfast we applied the stripper a bit thicker, then let it set for a full 3 hours. During this time, we made another trip to the hardware store for other supplies we found we still needed. When we got back to the floor, more elbow grease brought up more of the adhesive residue, but not enough to lay the new tiles yet. So our next approach was to take a sander to the floor. About 5 40 grit sanding belts later, we had made a good dent in the floor.

This was also the day we took down the vanity mirror and light, leaving our only light source a 1000 watt Halogen work light that added too much heat to the room. It also allowed us to discover that the last time the light fixture was changed, the wiring was done wrong, and instead of running the wires through the wall and into a junction box, they simply jumped the stud, wired it outside the wall and ran it back down the wall to the switch for the fan. Even that switch hadn't been done correctly, as they simply popped the original out of the wall, moved it down a few inches and left the hole open in the wall behind the mirror.
This is what I don't get the most when it comes to home renovations. If you're going to do something, do it right! Why leave a hole in the wall when you move an outlet? Why install a new roof over a rotting one? Why build a step into your garage with crooked 2x4s and 1/4 inch plywood? These things are easy to do right, if you just take the time to do it.
Now, I'll get off my soapbox.
 |
| open the wall |
 |
| close the wall |
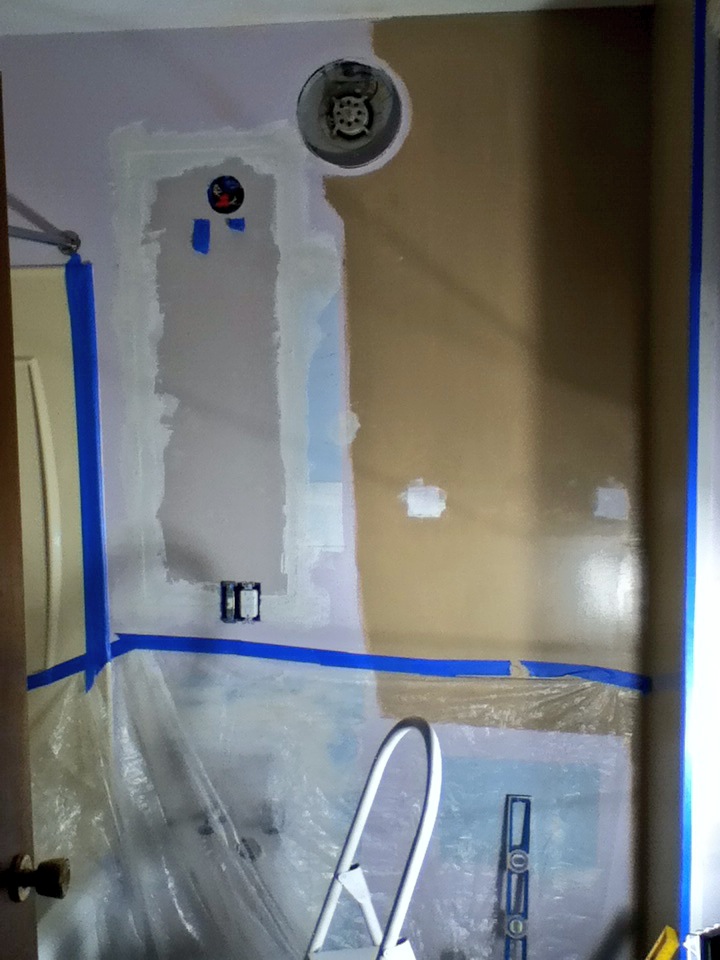
 While I would have preferred to not have needed this step, it did allow us easy access to recenter the new light fixture and outlet to match the new vanity. After getting the electrical shored up and the wall closed up, it was time to prime. I always use a separate primer when I have fresh drywall and spackling. It doesn't matter how much you spend on an all-in-one paint plus primer, it will not finish evenly from the fresh wall to the old pre-painted one. Fortunately, the vinyl tiles we picked out called for the wood floor to get a coat of latex primer before laying them, and we were able to prime the room before bed on Sunday, then leave it to dry overnight.
 We got up Monday morning and set straight to work finally painting the walls. With a fresh coat of primer, they only needed one coat of paint. Dave started with trim, and I followed behind with the roller, giving the whole room an even coat.
Once it dried, we began plotting the tile positioning and mounted the light fixture for a little better (ie: cooler) light.


A long night of cutting and laying tile left the last day to frantically install the fixtures by simply reading the directions on the boxes. Some plumbers tape to attach new valves, a hacksaw to cut replacement pipes to size and some patience as we lowered the new toilet onto the new wax ring, and we had a bathroom!

It was a race to the finish, as Dave stayed a couple hours later than planned to help get it finished and then pack up the extra tools he brought with him. We finished dropping the washer and dryer in place as the family got home. Once we had all the tools out of the room, it was time for the big reveal.
Over the course of the job, we ran to the hardware store at least once a day to pick up various items we found we needed, be it lumber for the floor patch, valves to replace the stuck ones under the sink, trim for the baseboards or a couple nuts and washers for the t-bolts holding the toilet to the flange. Of course, no project is truly 100% done on time. While I had the trim up, the toilet in, the water running to the sink and so on, I had not had the time to install new shelves in our linen closet, or to load the shelves above the laundry. So without further adieu, and with great fanfare, what you will only see here, the other side of the room!


Lastly, come Wednesday when I set out to start the first load of laundry, I found the washing machine wouldn't start. After a few minutes of investigation, I found in my rush to reveal the reno to Kate, I had neglected turning the water back on to the washing machine. I started to turn the valve, and it began leaking. Now I'll be replacing that valve before starting any other projects.
Thankfully, it was only the hot water line, so we'll be washing in cold until I get it done.
No comments:
Post a Comment